Advanced Figma Tips & Tricks
Oct 11, 2020
Figma, basically the greatest thing since sliced bread and so fast! After a short intro, you can jump right into designing. However, Figma also holds a few hidden gems I would like to share with you to improve up your workflow even further:

1. Figma Git! Builtin version history!
So you changed everything to auto-layout just to find out that constraints don’t work anymore and now you need to change it all back? Yup, I have been there. What would usually take you ages to revert and mess up your file, is just one click in Figma and you are back at a previous version. If you are a fan of Git or Abstract, this will make your heart beat faster.
Figma comes with an integrated version history you might not even have noticed yet. Go to Menu>File>Show version history, and you can see all periodically auto-saved versions und jump between them.
Click on the plus or ⌘+⎇+S to make your own version control. You can view, save, share, duplicate and restore file versions.
2. Smart selection & tidy
If you select a bunch of matching items (can be frames, groups or components but must be the same basic setup) you see a grid symbol on the bottom right of the selection frame. Click on it, and all items are placed magically in a neat grid!
Now this is already amazing, but it does not stop here, you will see pink lines between the items, drag and adjust the vertical and horizontal padding (also works via the right-hand properties panel). Furthermore, you can swap items by simply clicking on the circle in the centre and dragging them to a new position within the selection.
3. Import images quickly
Press ⌘+⇧+K and select multiple images. You will then be able to click on shapes, and it will fill them with the selected images one after another.
4. Adjust nudging
With the arrow keys, you can move objects if you keep Shift pressed while doing so they will “nudge” in larger steps. Per default this larger value set at 10px. You will be using this a lot, and it speeds up positioning. However, you might want to work on classic 8px Grid. In this case, you can adjust nudging via Menu> Preferences > Nudge Amount.
Note: Keep alt pressed and you can see the distances to other objects while nudging.
5. Arc tool
There is a little dot on the edge of every circle you draw, ever wondered what for it is? Its called the Arc Tool, press it and move your mouse and you can slice your circle. On the top of your slice, you then find another little circle named “ratio” to adjust. Once you activated your Arc tool, the properties will also appear on the right-hand side properties panel.
6. Batch create and (re)name components
Select multiple objects at once (e.g. icons) navigate to the component icon; you now see a dropdown choose “create multiple components”. Then press ⌘+R to rename layers (great for all sorts of layers by the way). Use a prefix, e.g. icons/ and add the current name or a list.
By the way: Layer naming, in general, is very powerful with Figma, you can search with regular expressions to rename your layers. This is quite advanced, and you find more information here.
7. Comment on components = CSS comments
You might have noticed this little comment section for components, its great for your own comments but what its actual purpose is, that it adds a comment into the code in your Inspect Mode for the developers to see. Very handy!
Note: In case you have not noticed yet; also any style in colour or font is automatically added as a comment to the Inspect Mode. So nice!
8. Play animated Gifs
This one was hiding in plain sight. Add a Gif to your frame as you would with any other image, then click on the image property and you can choose the preview image within the Gif. Activate the presentation mode, and that’s it, you will see your Gif in action!
9. Add links
this one is smiling at you from your main menu, but have you used it? Just select some text click the paper clip icon and add the URL to embed real links in your prototypes.
10. “Select all with same…”
You can batch change font, properties, fill, stroke effect and even find all other instances. Select an object or text and go to Menu> Edit > Select all with same… This has been a great help when tidying up my file and make sure all elements are the same and added to styles before hand-off.
11. Quick navigate inside group layers.
A handy shortcut is when selecting a frame or group. Press Return and you go down the group structure selecting all children. With shift+Return, you climb back up.
12. Move master components to own page
An automated master component page is the only feature I miss in Figma. Yes, there is the Assets tab, but I still like to have all master components in one place (as in Sketch) to get an overview and tweak them next to one another. Copy and paste will create an instance, but with a right-click, you can send your master components to a separate page and create your own overview.
13. Preview colour picker
Small but powerful. When you select a colour, with the colour picking tool, try clicking on colour but don’t release yet. This allows you to move the cursor freely across the screen and try out different colours in your selection.
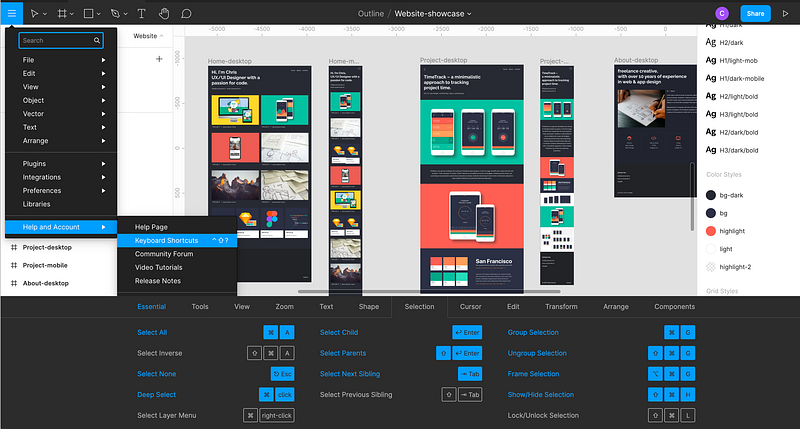
14. Shortcuts cheatsheet
I put those last because they are obvious but still so necessary. Press Shift+Ctrl+? or use the burger menu on the left to see all Shortcuts in Figma. Nice touch: The blue ones are the ones you already used, so give the grey ones some attention.
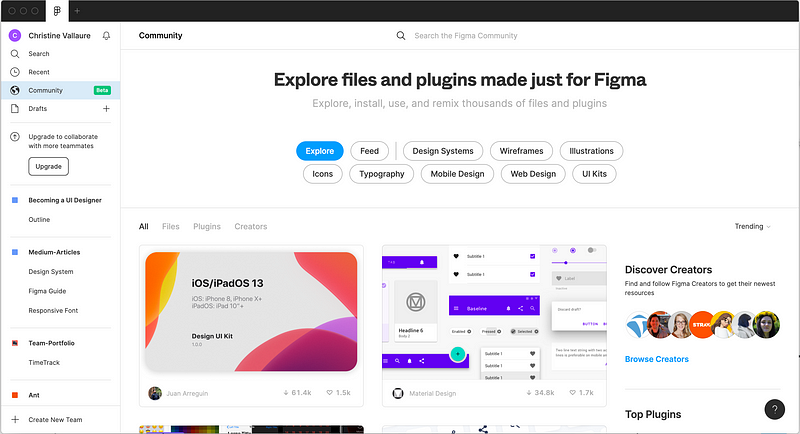
15. Use the community section!
Within your work area, you have direct access to files, plugins, illustrations, icons, design systems and so much more! USE IT!
Learn UX/UI online anytime, anywhere
Stay connected with news and updates!
Join our mailing list to receive the latest news and updates from our team.
Don't worry, your information will not be shared.
We hate SPAM. We will never sell your information, for any reason.
